Twitch
Broadcasting on Twitch with Livesync is easy and seamless. Before we begin, please note that the Broadcasting feature is available for Starter Plan users and above. If you’re on the Free Plan, consider upgrading to access this feature.
In this guide, we’ll walk you through how to connect Livesync to Twitch and start streaming with real-time face swapping.
Step 1: Open Backstage & Configure Destination
1. Go to the Streaming Section and start a Backstage session.
2. Click the ⚙️ Settings icon next to the Backstage button.
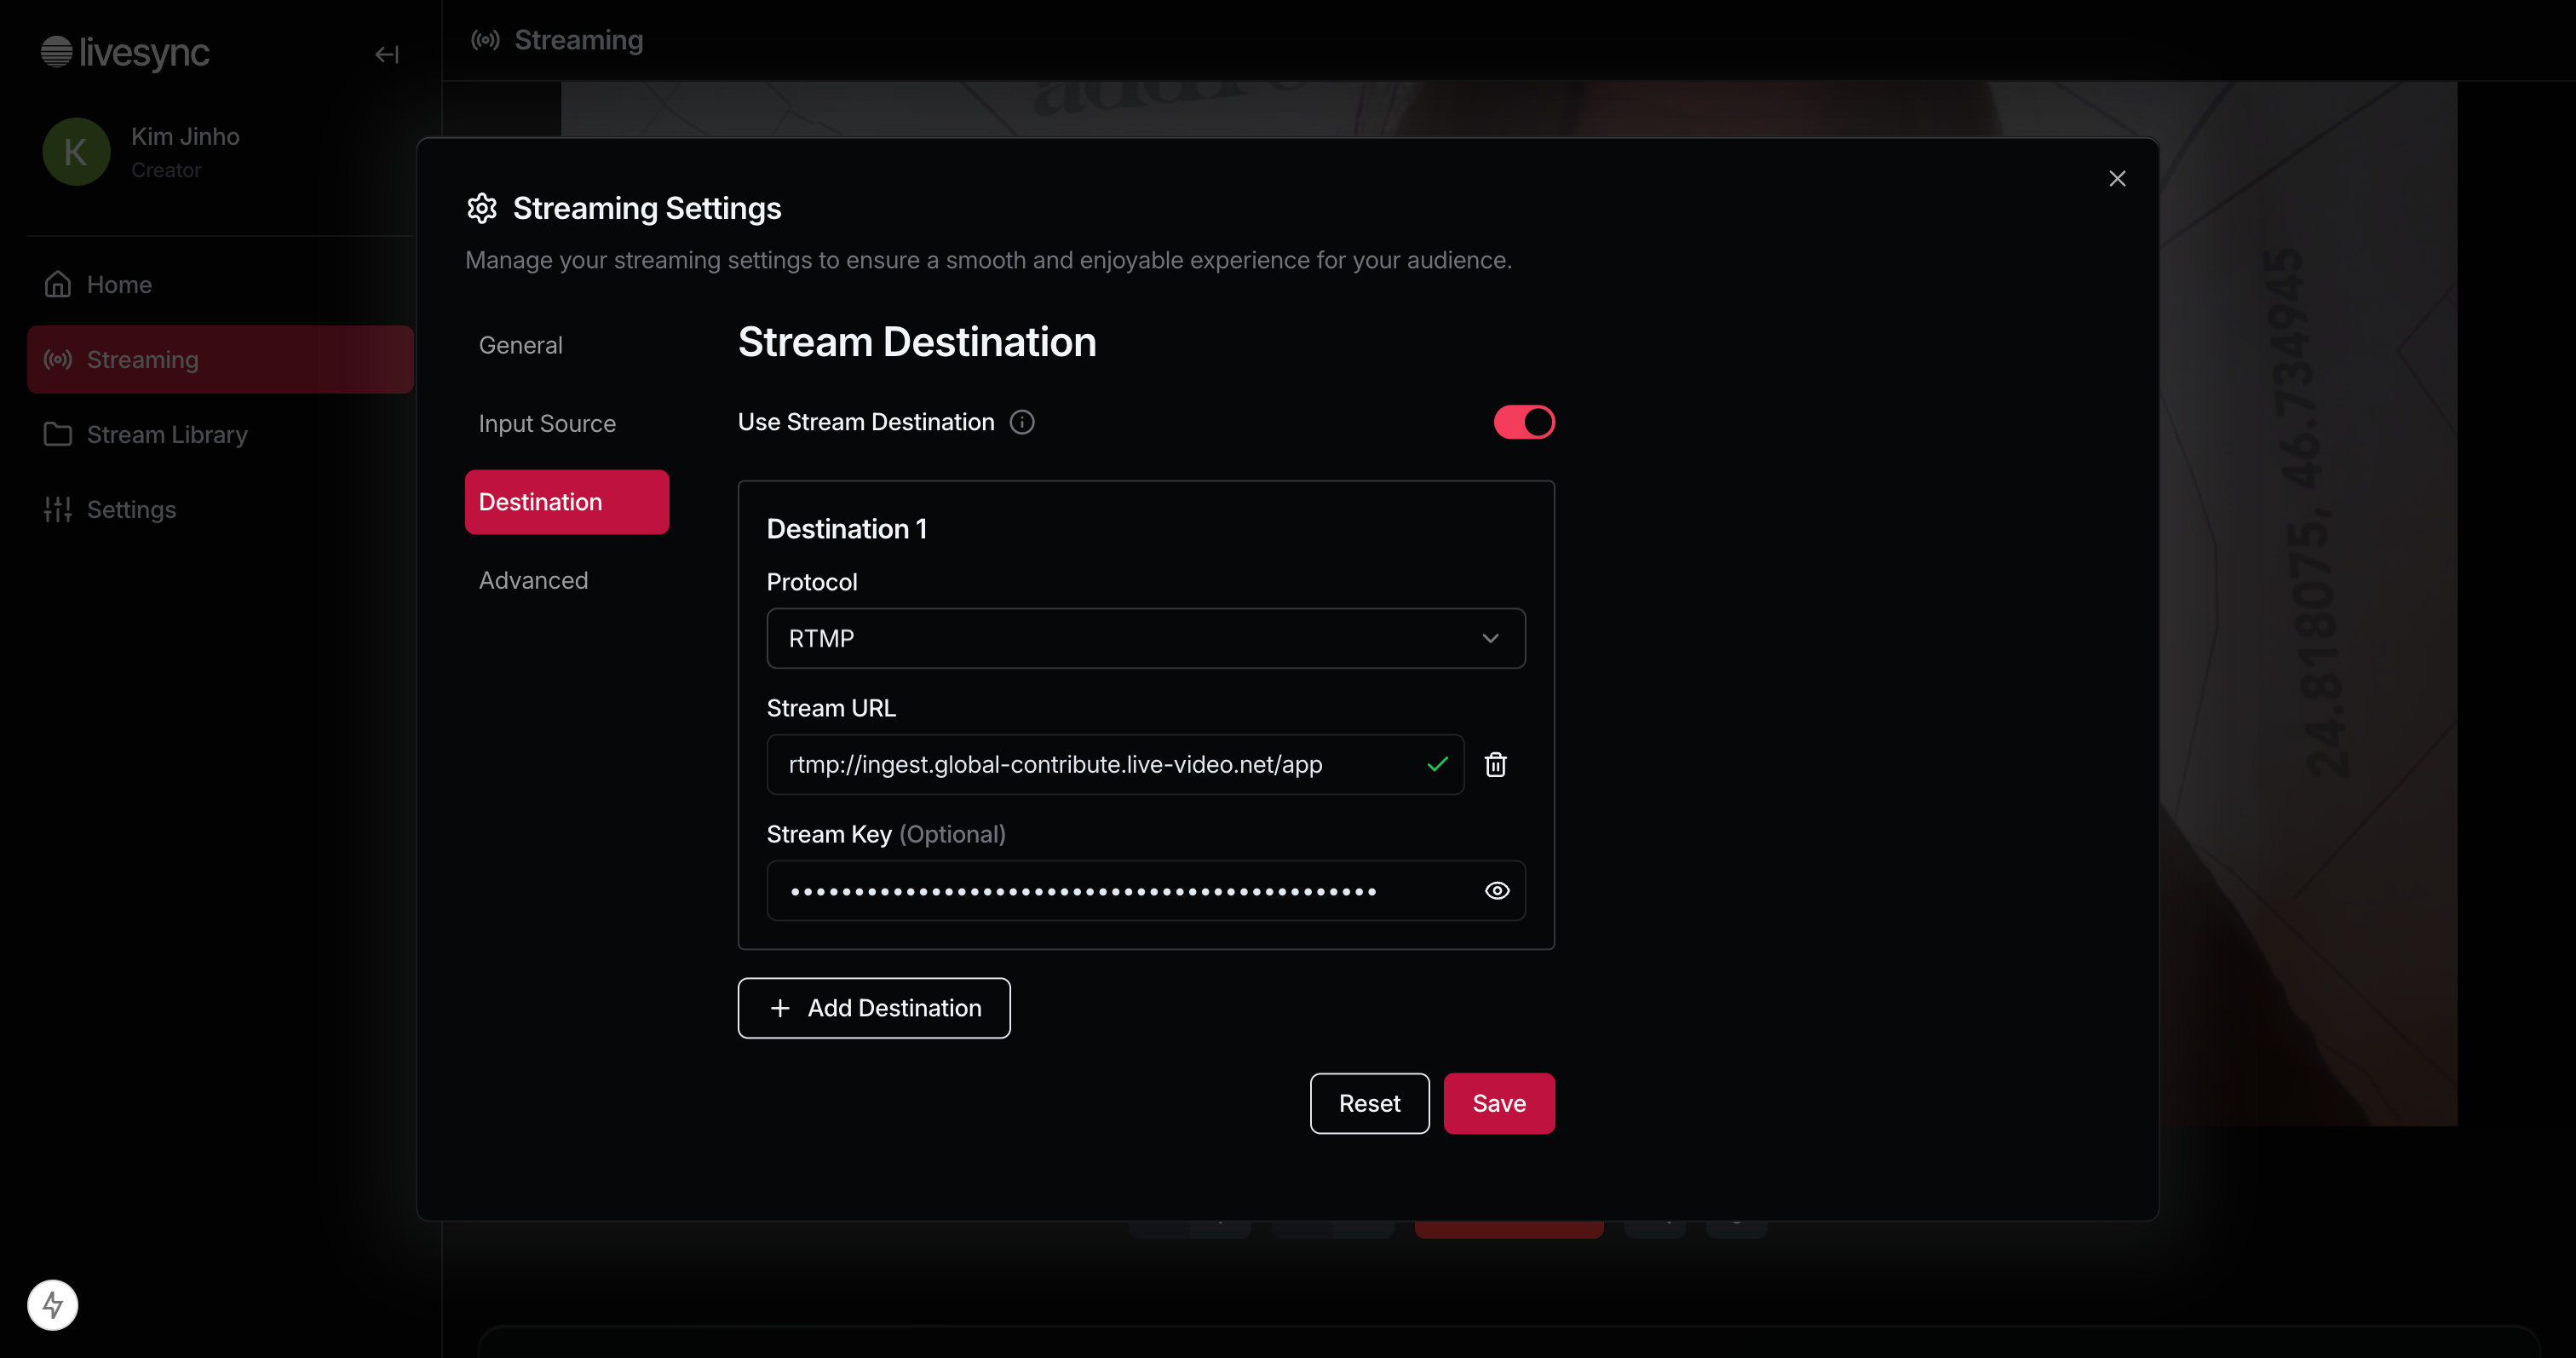
3. Go to the Destination tab and click Add Destination.
Step 2: Get Your Twitch Stream URL & Stream Key
To stream on Twitch, you need your Stream URL and Stream Key:
1. Visit Twitch Ingest Recommendations and choose the appropriate Ingest Endpoint.
- For this example, we’ll use rtmp://ingest.global-contribute.live-video.net/app.
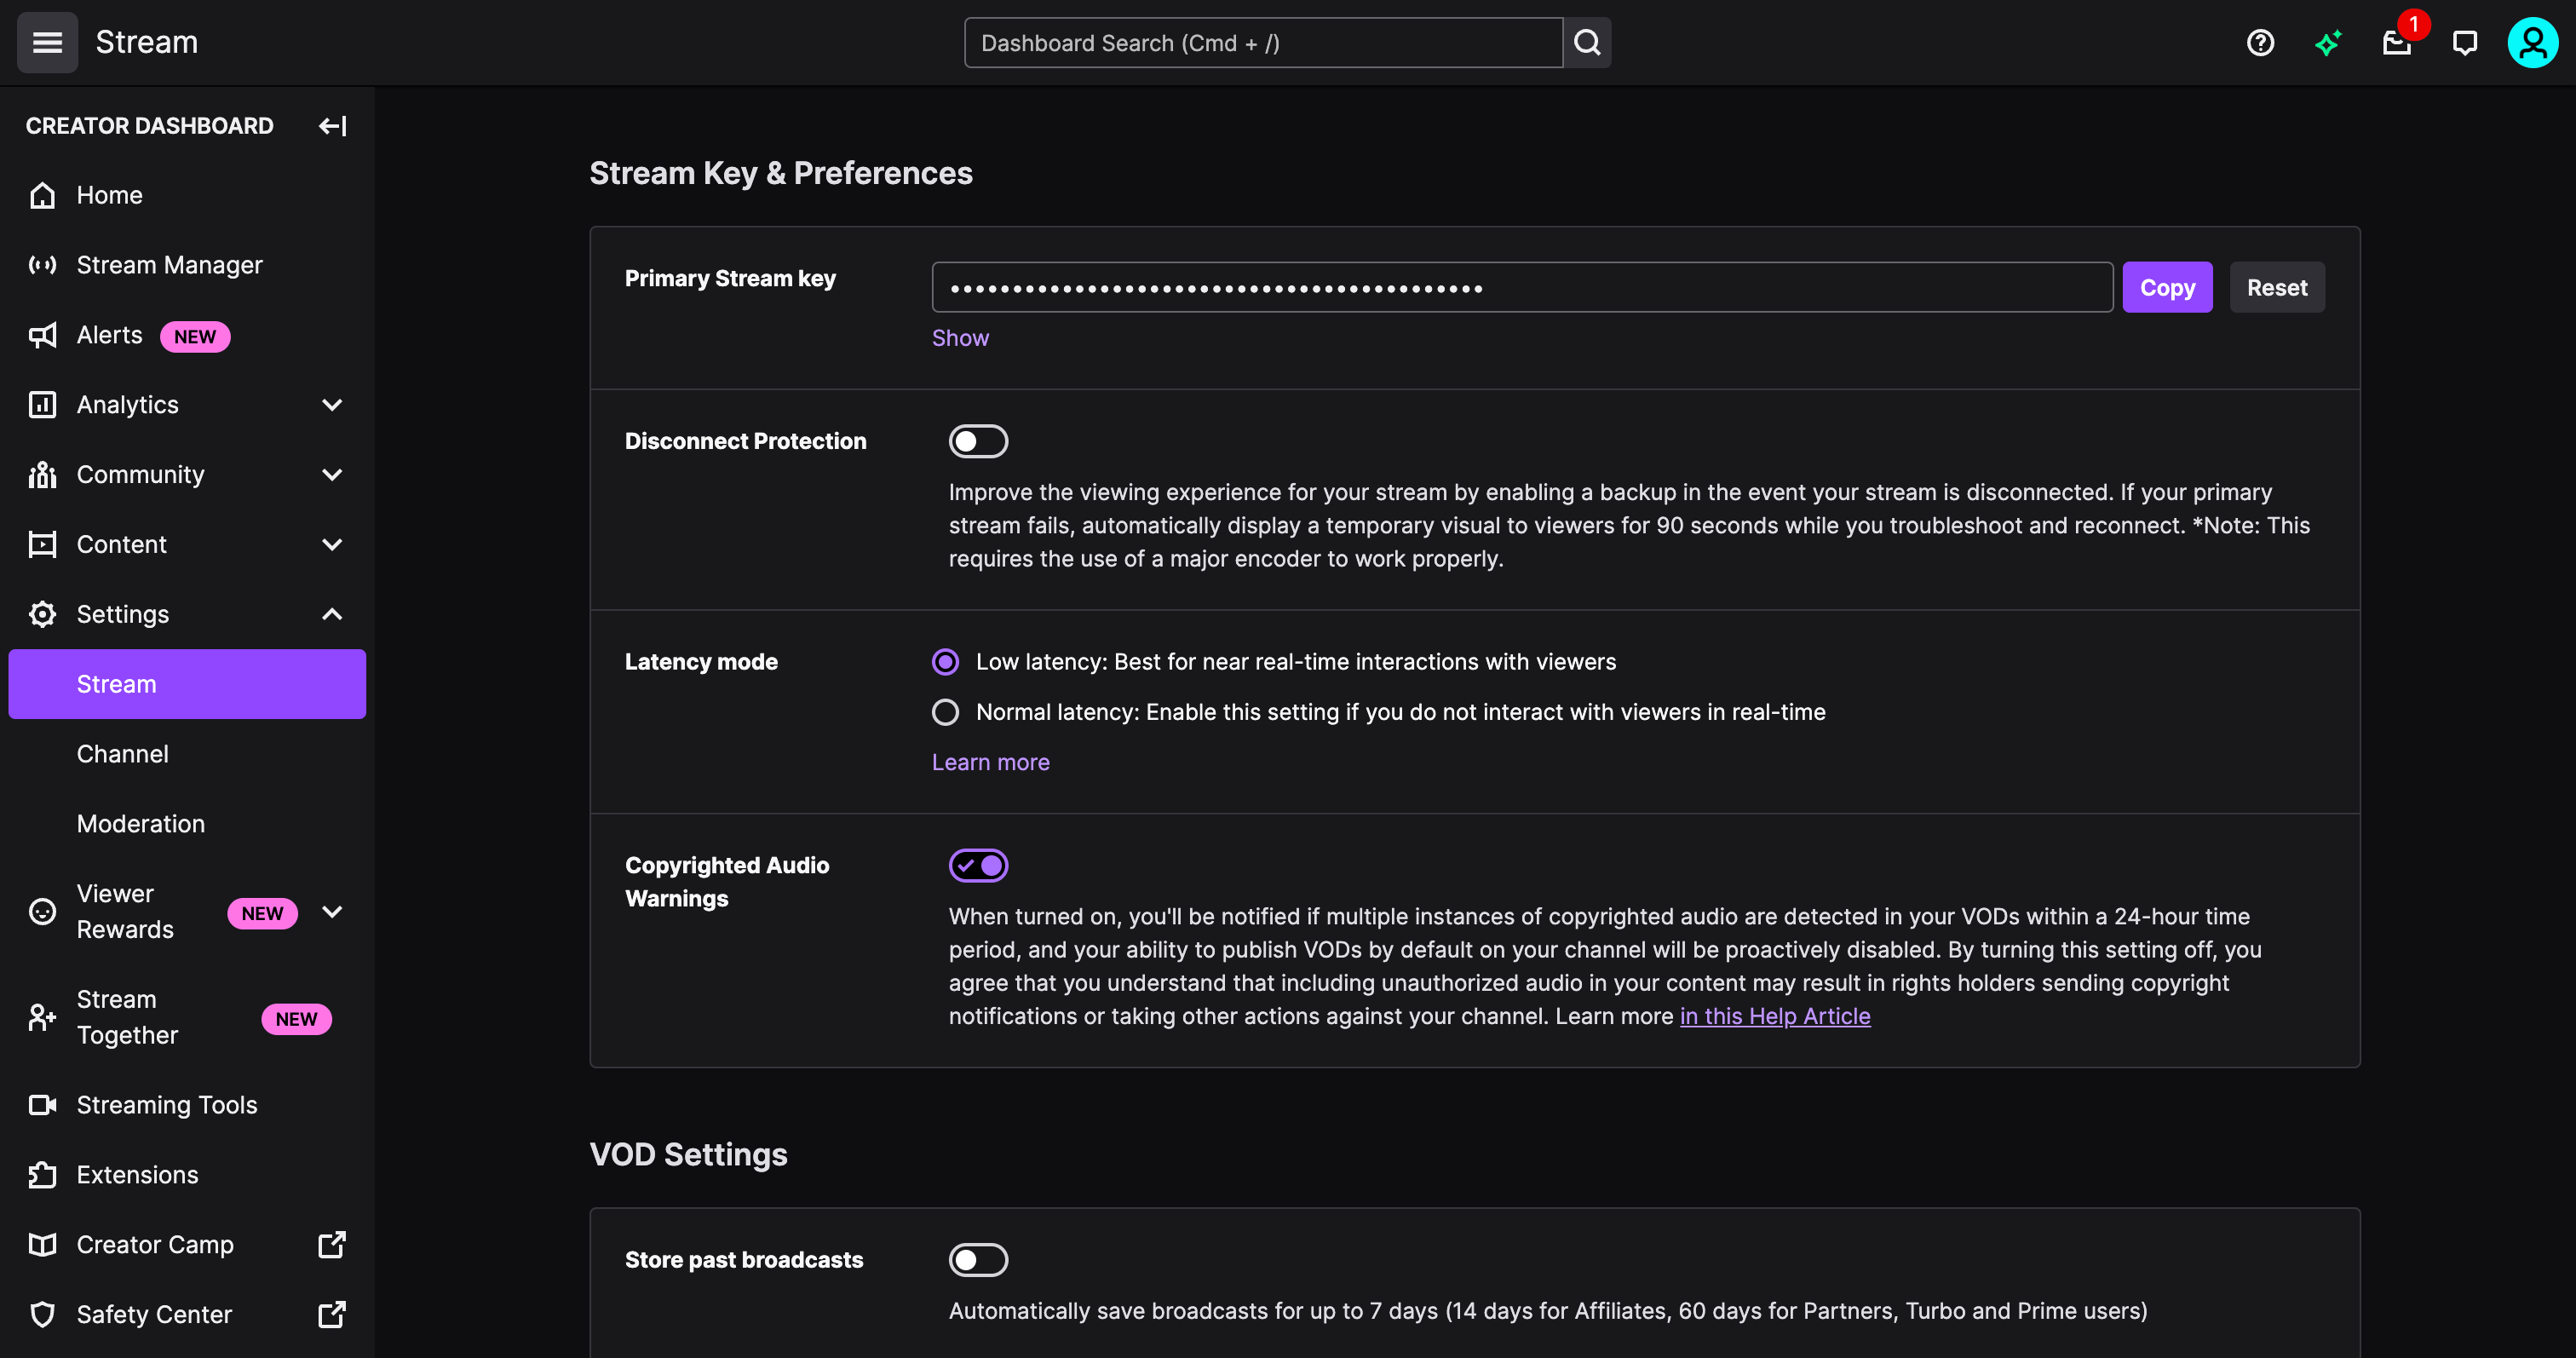
2. Go to your Twitch Dashboard → Settings → Stream.
3. Copy your Stream Key.

Step 3: Add Twitch as a Destination in Livesync
1. Back in Livesync, enter the Stream URL and Stream Key in the Destination settings.
2. Click Save to confirm your settings.

Step 4: Go Live & Start Broadcasting
1. Click Go Live—your stream will start immediately.
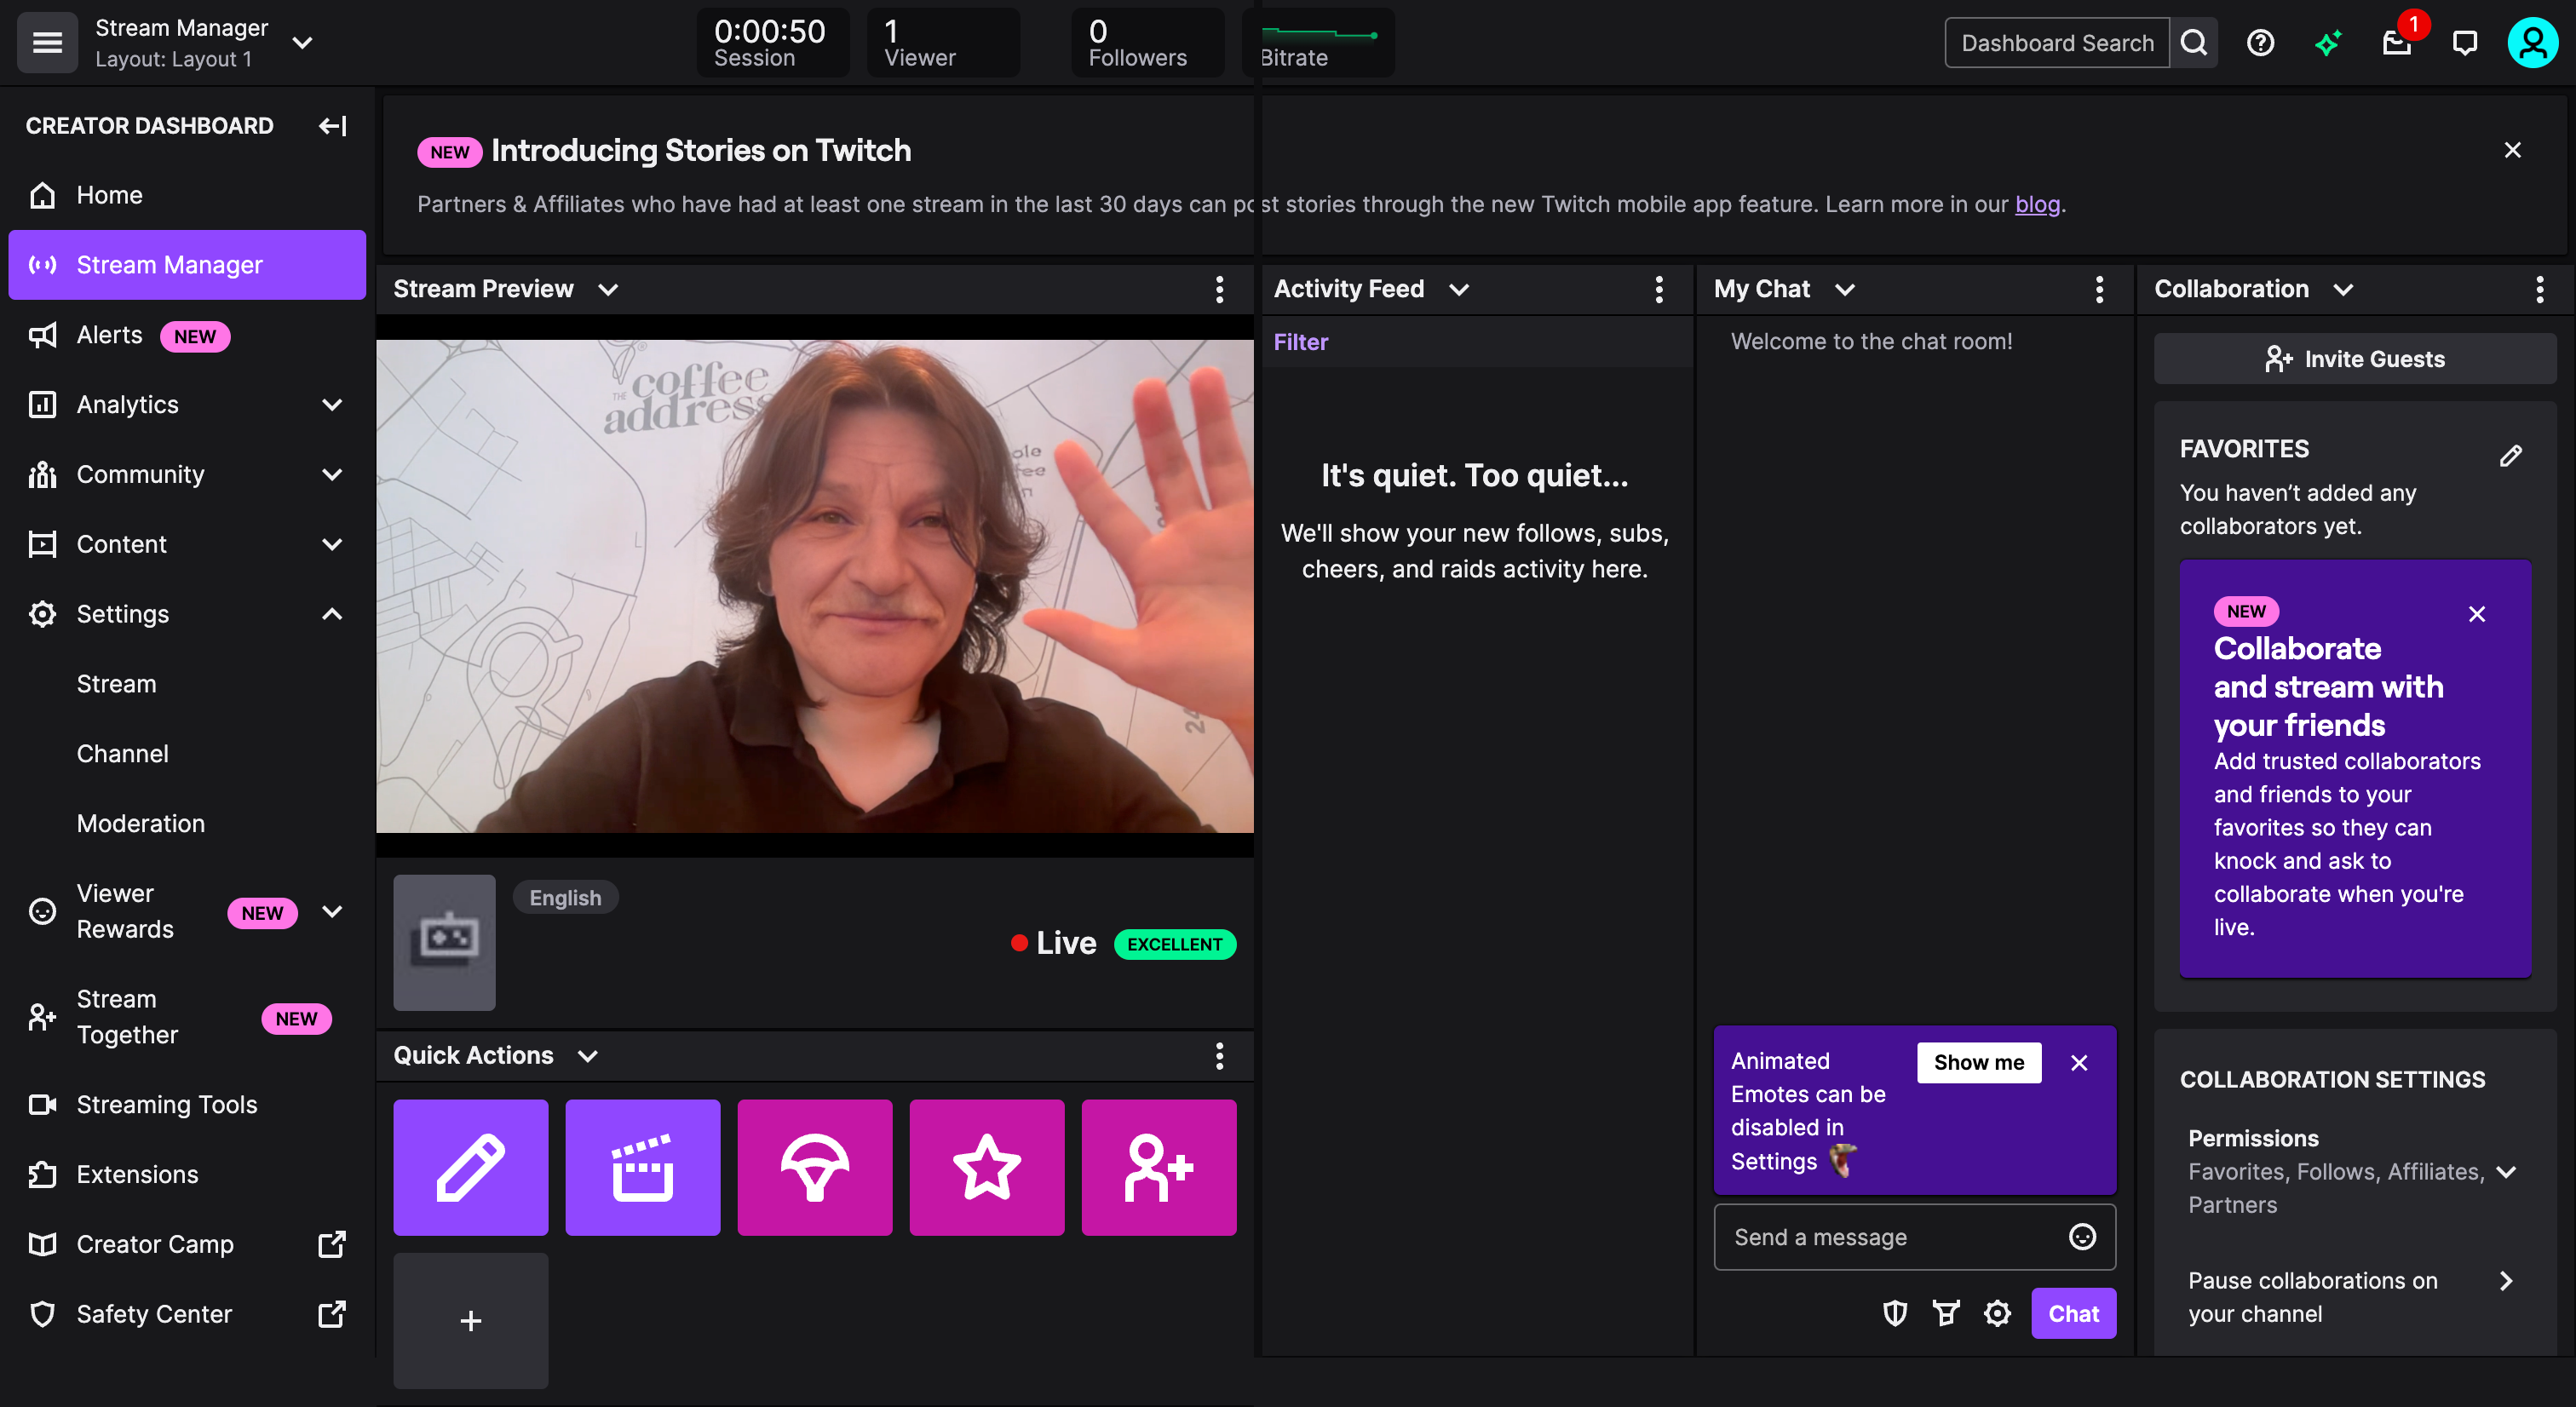
2. Open Twitch Stream Manager to verify your live broadcast.

Step 5: Enjoy Your Stream! 🎭
That’s it! Your face-swapped stream is now live on Twitch. Engage with your audience, have fun, and experiment with different personas while streaming.
🚀 Go Live with Livesync and bring your virtual presence to Twitch!

